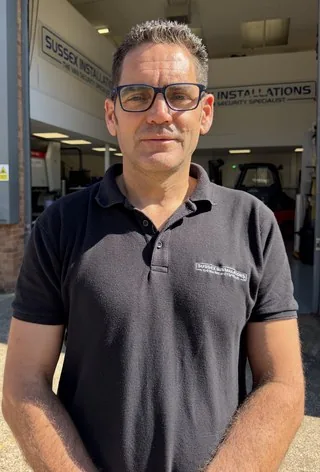
0:00 -Would you look at that? What an absolute mess. And not only is that an absolute mess, he's in a very strange place at
0:07 -the door. Hi, I'm Jeff from Sussex Installations. Look at the state of this brand new Ford custom van. Less than a year old.
0:17 -Thieves have made an absolute massive mess of this van. Look at the state of this hole. this big rip like tear all
0:26 -the way up here all the way to the left all the way to the right. It's damage across this top sway line like where
0:33 -it's bent here. They've bent up the edge of the door here. Like this is a big
0:40 -mess. Here at Sussex Installations, we're the van security specialist. And because we've got the tooling, the laser machines, the press break, and we've got
0:48 -the facilities for manufacturing van security. We're manufacturing the security like the shields that go inside the door like our absolute weapon of a
0:56 -shield which would go inside uh covering the latch mechanism of this van to give it some protection against an attack like this. But also we have the skill
1:04 -and the capability of manufacturing the external shielding that goes on the vans which is primarily as a repair product.
1:11 -Although it does also give some additional security. So we've got a security solution for this van. We have our absolute weapon of a shield that
1:19 -goes inside the door. We also have repair shielding for this van. A standard size repair shield that's going to go cover up typical damage around
1:27 -about here down to here. We have a large size repair shield which will cover up a larger amount of damage which will go
1:34 -like from this suage line across here and it will go away down here. But for this customer, so we can try and get an
1:41 -additional life cycle out of his door, get him back on the road, we're going to have to go extra large on this shield.
1:48 -customers brought his van to the right place because he's brought it to Sussex Installations and Sussex Installations is where the magic happens. Stay tuned.
1:55 -What we're going to do is we're going to see, can we design, develop, and manufacture a repair solution for this van? Can we get this tradesman back on
2:02 -the road? get him back in business, back to work, and then do we have an extra-large repair solution for this model van to offer you guys in case
2:11 -you're getting broken into and need an extra large shield to repair the damage on your full custom. So, before we're
2:18 -jumping into design a shield on that other van, I feel like the other van, that door is wrecked and so whatever shape that door is, it's not in the correct shape.
2:28 -[music]
2:28 -So we have our Sussex installations for custom here. And we already have this is the O2. This is the large size shield.
2:36 -So you can see it goes up to here and it comes down to here. And this one is colorcoded to the van so doesn't sort of stick out so much. We offer shields in
2:45 -brushed stainless steel finish. We offer them in matte black powder coated. And also particularly in the Ford range now we are offering them colorcoded for
2:54 -those who want them color coded and who can wait for us to paint them in the color of the van and those who want to pay for the additional cost for the
3:01 -color coding. But does look good. So this is our large size and what we're going to do is we're going to start with this van. Yeah. So knowing that that
3:09 -door is a big mess and not really trust and not being able to trust like the lines of that door and the shape of that door where it's been so bent up.
3:17 -Although we straightened it out a lot, it's like really we need to put in the homework on this van. So, we've removed our two large size shield from this van
3:25 -and we're going to go ahead and we're going to try and get the shape of a3 of an extra large shield.
3:35 -[music]
3:44 -So, you know, version one and like starting to sort of take the shape, but it's it's not quite there. We need to
3:51 -move a few of the the bends up a little bit here. Like we're going to go 7 mm up on this one. We're going to add an extra
3:59 -2 of meat to the top of this. So, like working through this very minimal little changes, you know, like just tiny little
4:07 -bits. Half a millimeter here, 3 of a millimeter there. And I think from this one just, you know, probably need to hit some of these bends a little bit harder.
4:16 -There might be other bends where we need to hit them a little bit less hard on the next one. So, this version five is looking good in terms of the actual
4:23 -shape of the shield and the fitting of the shield. But, we did run into just some problems with this location of this
4:32 -stud here in terms of the double skin that's on the inside of the door. That would foul the double skin. So, we need
4:39 -to remove that. move that stud up to here and then just move a couple of these studs just so they're proportionately in place. Yes, I got to
4:48 -move move two or three of these whole positions. So, back to the computer.
5:03 -[music]
5:09 -So, I got this off the laser as a two-dimensional flat bit of metal. We put all these little bends and shapes in. All the attention to detail cuz we
5:17 -want these shields to fit the van absolutely spot on. So, all the stud positions are good. That's good to go.
5:23 -We've learned all that we can learn from this van. Now, we're going to do the real one. We're going to get the real van in here. So, it's time now to chop
5:30 -away all this big mess on the van. Try and straighten up this door as best as we can. Try and get that back to almost like a normal shape. And then we can
5:39 -drill the hole locations for this shield. Check that they're all good. And then we'll go ahead and we will manufacture our jigs and our tooling
5:47 -that allows us to fix the studs. And we will make the real version of the shield afterward. It's time. It's time to cut the hole. Danny,
5:56 -the first thing we're going to do is take this latch out from from behind the door so we don't cut into the latch.
6:02 -don't cut into the wiring or the cabling that's going to this latch while we're cutting out all this metal.
6:08 -But also, it's going to be interesting to see if this latch is still in one piece because when fees break into them, they're actually breaking the latch. So, that's another expense which often
6:18 -has to be replaced that part. Sometimes they work, sometimes they work for a day, sometimes they work for a week, sometimes they'll work forever after
6:26 -they've been broken into. But a thief has smashed apart some plastic on that latch and they got all these springs and cogs inside of them and they're just
6:34 -really waiting to stop working. Um, and as soon as you sort of touch it and disturb it at this moment, that's the
6:41 -chance where it might just ping ping ping. Springs pop out, cogs pop out, and it'll never work again.
6:49 -We've probably got one in stock if he needs it. So, we're going to try and get him back on the road regardless.
7:00 -I don't
7:23 -know.
7:49 -It's all about health and safety here. Glasses, ear defenders.
7:55 -Shameable, [laughter] daddy. Don't know how you could do that to me.
8:03 -I missed the health and safety. I always have the the right boots on just for some day. I don't know how, but they must have jumped on my feet the wrong ones this morning when I left home.
8:14 -Listen, they must have jumped on. I am sure I didn't put them on.
8:23 -[music]
8:33 -[music]
8:42 -So, by now hopefully most of you all of you know the most important security measure on this van is to take away the
8:50 -factory latch shield, chuck it in the bin, but not the bin in the recycling because we like to do our part and
8:57 -instead fit our internal weapon of a shield. Triple layer thick in the most vulnerable places. This is the number
9:04 -one security um product that you should have for your van. The best value security improvement per pound spend for this model van right now.
9:18 -So that latch shield going on from inside the door and then we just bolt it up into position from outside the back edge of the side low door here.
9:31 -Yeah. So again, I cannot express the importance of having this internal shield standalone shield inside the door. And I'll read comments after this.
9:39 -You should put the shield inside the door. Like our internal shield does go inside the door. It's our stealth shield. You just don't know it's there.
9:47 -Not from the outside of the van. We are going to be fitting an external large extra-l large repair shield on this van.
9:53 -But having an internal shield, that's where the magic happens really. That is the most important part for this van.
9:59 -Like, and I had a comment on the last video where we showed a van that massive attack into the van, massive attack on the deadlocks, massive attack down here
10:08 -on the latch where they did not get into the van. And over the comments, oh well, like another security company does similar like does the same stuff like
10:14 -that. No, they don't. This is our own one-of-a-kind shield. Nobody else is doing this stuff.
10:34 -[snorts]
10:43 -[snorts]
10:47 -So, for some of these holes, you need to be really careful when he's drilling. He just pops the drill bit through just a tiny bit and doesn't keep going through the door panel cuz there are some wires and cables inside this door.
11:04 -[music]
11:06 -So, we bolted this in place using nuts and bolts just to sort of check all the hole positions, make sure I can reach them, make sure we can get the spanner to them, make sure they're all in a good
11:14 -position, and make sure that the shield is sitting on the van nice. But you guys not going to want a shield looking like this with all the nuts and the bolts on
11:22 -it like that. So, it's time that the real work goes in now. We got to manufacture the tool in so we can actually make this with the weld studs attached to it. So, it's like a consumer ready product. So, on with the show.
11:34 -Look, we're we're going for the real life one now. We made all the tool in so we can attach the studs in a nice professional way. Show Show me these studs, Danny. Let me have a look.
11:44 -And you look at this like you look at the quality of the work we do. It's incredible. All these really, really nicely fixed to it without all the
11:51 -splatter. Nicely in a line. All fixed perfectly. That's where the magic happens. like the stuff we produce, the
11:58 -quality of it because the quality of the tooling we produce like it's not just developing the shields like we develop all the tooling and the processes behind
12:06 -it. Just make sure it's spot on at every stage. So Danny's marked up the position using our gasket material as the template using the measurement we've
12:15 -supplied for the gasket material. Using the gasket as a template and he's drawn the hole locations for um where the studs are going to go and now he's just
12:23 -doing a test just to check. This is an important part. Check that where you've marked up the holes, they they look good with the shield before you drill them.
12:32 -So, look, you see the lines and if you just press the stud up against it, we can see that yeah, it's in the right place.
12:39 -They're lining up good. They're looking good all the way around. It's going to be good. these like just because the angle
12:47 -these top ones are coming in at, it's probably going to press up against like the bottom at this stage, but actually time we go in the holes will be in the right place.
12:56 -So, we already drilled these yesterday, of course. So, just getting the the drill in position for the instruction manual. Action shot.
13:04 -Nice. Doing like the real test fit at this point. Making sure that the shield is in the correct position as well where it lines up with the suage lines of the van. So, yeah, that's looking good.
13:15 -That's looking good.
13:21 -Yeah, that's looking perfect. So, that's ideal. Like, if there is any adjustments that you need to make that if the one of the holes need opening up or all the
13:29 -holes need opening up or slightly moving, now's the time to do it before you go to the trouble of cleaning everything down [music] and then realizing at the end, oh no, I need to
13:37 -take it all apart again, open up a hole slightly. So, perfect opportunity right now. And that's good to go. And we know
13:44 -that we can proceed, clean down, rust protect, crack on with the job. I near I nearly forgot. I was so there like
13:51 -concentrated on us like checking that it lined up with the suage line and that of the door. I forgot to do the magic
13:58 -finger test to make sure that it's the shield is aligned like perfectly with the edge of the door.
14:05 -You can't you can't you can't leave the magic finger test till the end. You need to do it like right now is the time. So, if you can't fit it right now, if the magic
14:13 -finger is not happy now, the magic finger will not be happy when you finish the job. So, let's check it's good.
14:22 -I think it's good. Is there room for that to shove over like a tiny little bit at the bottom?
14:28 -Yeah, there is actually. So, that could go over ever so slightly. I felt like it was like it's in the right place, but there's also ever so slight bit of play
14:36 -on it where we could maneuver it. Half a mil here, half a mill there. It's good. You're good to go, Danny.
14:45 -[music]
14:54 -[music]
14:58 -[music] Heat. Heat.
15:05 -[music]
15:20 -[music]
15:28 -[music]
15:46 -So, all the nuts on. We just tightened up the ones on the outside edge here.
15:50 -Now's the time for the for the magic finger test just to check that it's in line with the door.
16:00 -Yeah, it's good. So, we can go inside, tighten up the bolts inside now.
16:14 -But the question is, after all this work we put into it, are we ready? Yeah. You ready?
16:19 -Definitely. Are you ready? The tea. How does this look? It's a big boy. It's a big shield on this van.
16:26 -There it comes.
16:40 -Whoa.
16:42 -Considering the state of that before when it coming in here, that's looking pretty good. But that's a big shield.
16:50 -It was broken and look at it now.
16:53 -Looking good. So, it's been a lot of work. It's a very large size shield. But I bet that this owner of this new shape
17:01 -full custom is not going to be the only owner we're going to have who's going to have a massive hole in their door who's going to need a solution to get their van back on the road rather than it
17:09 -going in the garage, spending five grand on a repair, being gone for weeks. So, if you're watching this video and you've got one of these uh new shape for custom
17:17 -vans, you got a big hole in the side load door, we might well have a solution ready to go on the shelf for you. I know we get in the comments a lot of people
17:24 -say about it look better if it was color coded to the van, if it was painted and color matched. We do actually offer that service. So, if you're thinking, well,
17:32 -actually that's a big stainless steel uh shield. I mean, is really good quality brushed stainless steel finish. But if you're sort of thinking that might look
17:40 -better in the same color as your van, then check it out.
17:44 -Now it's brand new. That's our colorcoded version fitted to the van now. But it looks really, really nice.
17:49 -Really in keeping with the van. Doesn't stick out. And it's actually a really, really viable repair solution. Fast, cost effective, and you're not having to
17:56 -have like the whole of your van painted down the side so your van looks like a write-off. It's just a shield that and you barely notice it in all fairness.
18:03 -Underneath we fitted our internal stealth shield, which is an absolute weapon of a shield, which is a standalone product, not connected to the external of the van. And we've also upgraded this van with hook deadlocks.
18:14 -Please do give us a like for the video.
18:16 -Please do subscribe to our channel. If you're looking for security for your van, please get in touch via the website. It's www.sussixinstallations.co.uk.
18:23 -And the last thing to say is thanks for watching.
Transcript source: the YouTube transcript supplied for this project with minor corrections. Automated transcripts can contain recognition errors and should be checked against the original video.