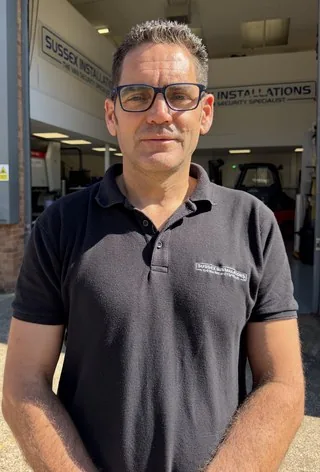
0:00 -this is the installation video on how to
0:02 -fit your plate your Sussex installations
0:04 -security plate for your box will Vivaro
0:06 -your Renault trafic unison Indy 300 or
0:10 -your Fiat talento vehicle so what comes
0:12 -in the kit is as you seen there that's
0:14 -our outer shield and it's branded Sussex
0:16 -installation so if your if you find any
0:18 -similar products on the market after we
0:21 -launch this because you may well do make
0:22 -sure that you're buying one that's got
0:23 -the Sussex installations trademarked
0:25 -brand embossed in it because it's a
0:27 -symbol that you've got the internal
0:29 -shielding that goes with it that it's a
0:31 -bolt through the body style product he's
0:33 -got this for spoke children which we've
0:35 -designed and made and this is to protect
0:37 -the internal latch mechanism inside your
0:39 -vehicle so it comes with a gasket it
0:42 -comes with the kit it comes with the
0:43 -nuts and the bolts the stainless steel
0:44 -ones and it cabined through the grommets
0:46 -which you'll need after making the hole
0:48 -through the bodywork ok so let's get
0:56 -started I've got Danny here he's with me
0:58 -and he's gonna show us how to fit this
0:59 -Hoff
1:00 -he's gonna be my he's gonna be my hands
1:02 -for this job so I'm gonna talk you
1:03 -through it and Danny's gonna do the
1:05 -fitting of this today so bare with him
1:08 -this is his first one today so it's
1:10 -gonna be a good challenge for you Danny
1:11 -are you ready for the challenge right
1:14 -okay let's do it Danny this guy so first
1:19 -up we kind of musk and tape up the area
1:21 -and that's going to enable us to mark up
1:23 -with a pen where we're going to fix this
1:25 -plate you can go a couple of layers fix
1:29 -with this even thicker if you want if
1:31 -you're sort of not confident with a
1:32 -drill and you're worried about it
1:34 -snapping but typically just take it easy
1:36 -with the drill go slow take your time
1:39 -don't push it
1:39 -awkwardly and you'll be just fine so
1:42 -take the gasket line it up make sure
1:44 -you've got it the right way around and
1:45 -you're going to have the paper side
1:46 -which is going to be the sticky side
1:48 -facing outwards so we'll stick that to
1:49 -the plate but first we're going to use
1:51 -it as a template to actually make the
1:52 -holes make sure you've got a couple of
1:54 -millimetres sorry say three millimeters
1:57 -gap between the swage line of the body
1:59 -and the and the template and the gasket
2:02 -so we can probably go just up a little
2:03 -bit higher than that yeah and waiting in
2:06 -that's that's looking pretty good I'd
2:08 -say you got it spot-on there Danny so
2:09 -you're gonna make them just slightly
2:10 -bigger than the actual stud holes
2:12 -themselves anyway so
2:13 -it'll be a little bit of room you know
2:15 -couple of millimeters room to maneuver
2:16 -one t30 torx to take off the screw for
2:21 -the handle and I'll just show you that
2:28 -as they take it off there just have to
2:30 -turn that into a just a funny angle to
2:33 -allow you to pop it off just like like
2:34 -so and next is going to be the remover
2:39 -this is what we use which is a plastic
2:41 -tool that doesn't scratch the bodywork
2:42 -but if you don't have one of them let's
2:44 -say you could use like a you know just a
2:46 -screwdriver to get your style flat
2:47 -screwdriver you could put a bit of tape
2:49 -around it if you're worried about you've
2:50 -been just scratching your your band or
2:53 -your door card pop it all around there's
2:58 -quite a few poppers on this door and
3:02 -there we go so that's all the poppers or
3:05 -the puffers pop so you're gonna drill
3:10 -the middle of these in these holes which
3:12 -is made on the outside
3:28 -these two hold here on the edge
3:30 -these actually need to go through to the
3:33 -other side also so we we need to make
3:35 -another hole on the outside or sorry on
3:38 -the inside of the vehicle just here but
3:40 -we want to make it just dead dead in the
3:42 -middle if you follow the drill through
3:44 -straight hold it drill straight against
3:46 -the bodywork yes
3:57 -and you see it come out the other side
4:09 -that's great okay what we're going to
4:13 -want to do is we're gonna drill we can
4:15 -use a 19 mil hole source so we actually
4:17 -want this hole to be dead in the center
4:19 -from here to here so though we've got
4:22 -this hole which is not directly in the
4:24 -center
4:25 -Danny's now gonna use that for a
4:26 -reference point and he's going to make a
4:27 -hole exactly just mark it up exactly in
4:30 -the middle of this panel here and in the
4:32 -middle of this panel here if you've got
4:35 -the tools if you've got a punch you can
4:37 -use a punch just to help so it doesn't
4:39 -slide but we're just doing this with
4:41 -minimal tools available really just to
4:43 -sort of simulate what tools you might
4:44 -have at home if you're if you're doing
4:46 -this sort of DIY so then all the way
4:51 -through with the pilot reel find your
4:55 -fingers
4:57 -[Music]
5:09 -[Music]
5:18 -now these holes actually need to be made
5:21 -out to 19 millimeters now so what as you
5:24 -go with the 19 mil drill bit you might
5:27 -find you're brushing your your actual
5:29 -drill against the side here so if you're
5:30 -worried about scratching this with the
5:32 -drill it might be an idea just put a
5:34 -couple of layers of masking tape so we
5:35 -just do that for this video here
5:42 -so using the pilot how old the one
5:45 -that's in the center of this you're
5:46 -going to use that to hold this from from
5:48 -wobbling from walk in to using that to
5:50 -adjust it just go very slow with this if
5:51 -you've got different speeds on your
5:52 -drill you might switch it to the slower
5:54 -speed for doing this be careful as you
6:03 -drill this obviously once it goes
6:05 -through you want to make sure that you
6:06 -don't actually drill through to the
6:07 -outside of the of the van but you do
6:10 -need to go a little bit further we do
6:12 -need to take this piece out also however
6:14 -you're not going all the way through to
6:16 -the outside of this body with this hole
6:17 -you're just going through that a little
6:18 -bit
6:24 -are we filming for this a Charlotte yes
6:29 -we are what can we do for you
6:49 -again we're not going all the way fruit
6:51 -with those ones just just drilling out
6:54 -the inner in the skin they're here just
6:57 -allow us access to do up the the nuts
7:00 -here so next step is these outside holes
7:04 -these need to be drilled out two
7:06 -millimeter now but Danny on the case it
7:10 -should shouldn't take long at all
7:22 -might be safer if you do the outside
7:25 -ones with the door open just so if you
7:27 -do follow through with the with the
7:29 -eight mill you're not going to punch her
7:30 -up against into the rubber area at that
7:32 -ban okay perfect so we've got our holes
7:46 -next to do is to take off that masking
7:49 -tape so the main thing is just to make
7:52 -sure all these little metal filings that
7:53 -are here on the bodywork that they all
7:55 -they all go away so however you do that
7:57 -well if you're doing it like gas with
7:58 -the compressor or whether you're doing
8:00 -it by hand you know you might be doing
8:02 -it work with the with the dustpan and
8:03 -brush but again being careful obviously
8:05 -not to scratch your band but we've
8:07 -having the metal going up against it and
8:09 -it can be that once you finish with a
8:10 -job that you can give the van a good
8:11 -wash but just look at like the stuff on
8:14 -the bumper you don't any of this to be
8:15 -here
8:15 -once you've finished it we've got a
8:18 -compressor here so we're going to use it
8:19 -for this job
8:55 -so next thing that's for us protection
8:57 -use and manufactures approve rust
8:59 -protection and what we would suggest is
9:01 -if you don't have any better advice back
9:03 -so it's a very good product for rust
9:05 -proofing and you're just squirting where
9:19 -the holes are so you've got two hulls
9:20 -which are access to pull from inside the
9:23 -door panel up in here and you've got two
9:26 -holes which are accessible from the
9:28 -access house which we've made just here
9:36 -and then of course importantly is from
9:40 -the outside most importantly is from the
9:41 -outside wax all these holes all around
9:46 -the Waxhaws great stuff I mean you can
9:47 -put this inside the door anywhere that's
9:49 -in the door here you can have a good
9:50 -spray up anywhere where any of any
9:53 -little filings if you've been unable to
9:54 -blow them all out then you can have a
9:56 -good good spray up in there and
9:58 -manufacturers often do this with it
10:00 -anyway so the more you've got in your
10:03 -sighted the author the mirror really
10:04 -obvious you don't it dripping down your
10:06 -bump you got so much but you know it's
10:09 -good stuff
10:10 -help you look after your van
10:16 -right so the next step is going to be
10:19 -sticking the stick in the gasket to the
10:20 -backplate so find out which way work out
10:28 -which way around it goes it's shaped so
10:31 -it can only actually go one way and then
10:33 -remove the sticky part from the gasket
10:35 -and then you can stick it on so the
10:47 -inner shape play if we just show that
10:49 -the direction that's going to be inside
10:52 -the door it's actually going to go like
10:54 -that so what you you don't hatch that
10:55 -you can actually have to take this latch
10:56 -mechanism out you're looking to pass
10:58 -this inside the door in there and then
11:01 -in that angle it wants to stay go behind
11:05 -the plate so against there just just
11:07 -unclip in the cable from them when these
11:09 -clips are allow a bit more movement to
11:11 -get the plate in there danny is having a
11:21 -little bit of a fiddle he's getting it
11:22 -getting it through there just with the
11:24 -just where the cables in place to the
11:26 -outer door handle him you could
11:28 -disconnect the height cables or than the
11:29 -handle but it's not necessary with a bit
11:31 -of a wiggle you should be here to get it
11:32 -through there I just take this
11:34 -opportunity as well to say that if
11:36 -you've got a lock on your back door here
11:39 -and lock which would have a rod which
11:43 -would come off at the back of the barrel
11:44 -from here and then go out to that the
11:48 -latch mechanism here then I would say
11:49 -disconnect this at this point because
11:51 -that is a security vulnerability I would
11:54 -take the rod away from the barrel and
11:56 -take it off of the latch if if you have
11:58 -to if this means you have to take the
12:00 -latch out the door it's actually quite
12:01 -easy to do that you can do it here with
12:03 -these free three t35 bolts here and that
12:10 -but that should come off in my opinion
12:11 -that should come off some of the vans so
12:13 -most of the vans don't have one this van
12:14 -doesn't have one
12:15 -then why some do but it is a big
12:17 -security risk by having that there also
12:19 -if yours is actually like a work van
12:21 -there's an internal lock unlock button
12:24 -here and I would also but in our case
12:27 -we've we're disconnection that it's not
12:29 -necessary we want that gone we want the
12:31 -rods gone we want to go for maximum
12:33 -security of course there is a
12:35 -possibility one day in the future if you
12:36 -sent your lock and goes wrong you could
12:38 -have a bit of a problem but most things
12:39 -don't have this lock and unlock function
12:41 -anyway so it's obviously a very small
12:42 -risk and it's up to you to decide what's
12:44 -most important I would suggest get rid
12:46 -of that lock
12:48 -okay so Dan is now holding the the
12:51 -internal plate with one hand and if
12:53 -you've got an assistant or a friend or
12:55 -someone that can help you might get them
12:56 -to hold that for you so you can
12:58 -concentrate on line in this up on the
13:00 -outside obviously don't want to scratch
13:01 -there the outside of the van by putting
13:04 -it in the wrong place
13:05 -through the holes so the internal shield
13:10 -you can see the internal shield coming
13:12 -through the edge of these holes here and
13:14 -then we're going to put on the washers
13:16 -and the nuts so to actually for us to
13:19 -get the nuts and the washers on this we
13:20 -probably need to push that back a little
13:22 -bit inside the inside of the bodywork in
13:26 -order to get the nuts through and be a
13:28 -little bit awkward to get them to get
13:30 -them started if that if we've got it
13:32 -that far forward you're gonna in turn
13:35 -the ones first Danny
13:45 -that's one of the internal nuts and
13:48 -there's another one just a little bit
13:49 -higher it's difficult to see it from
13:50 -inside the door here that's the washer
13:55 -going on now it's than that going on
14:00 -no pressure Danny said not drop the the
14:03 -nut or the washer inside the door here
14:04 -no one's watching he's doing very well
14:47 -so these studs is really important not
14:50 -to over tighten until you're going to do
14:51 -them up tight enough that you see this
14:53 -you know you see the gaskets start to to
14:55 -pull you don't wanna get mad with these
14:58 -wear your eye for prey come off will you
14:59 -distort the the bodywork there you stop
15:02 -sending the door around if you do about
15:03 -to time
15:10 -the nuts are locknut so they're not
15:13 -going to come undone
15:20 -anymore do these up after and now to do
15:34 -the ones inside you could use a spanner
15:39 -10 millimeter spanner rattle ratchet
15:41 -spanner for these then it's going to go
15:43 -for it with a with a quarter inch drive
15:46 -and ten millimeter deep socket and again
16:00 -then as you start to feel it doing up
16:03 -want to keep just keep it on it from the
16:05 -outside run it to pinch put not to over
16:10 -tighten it yeah a little bit more okay
16:18 -that's pretty much it there yeah and
16:25 -then next is a top one so the gas it's
16:27 -starting to compress now just a little
16:29 -bit more Danny
16:39 -that looks about it to me now just have
16:44 -a look check over them or if you want to
16:46 -need to do that a half a turn on one of
16:48 -them then you can do so let's see I
16:51 -think now that we've done this end up
16:54 -this this end probably just needs a or I
16:56 -think just this top corner maybe just a
16:58 -little bit of a little bit and if this
17:00 -one up again don't go mad for these
17:03 -you're damage it if you over tighten it
17:05 -I think that looks good yeah we can go
17:15 -maybe just a tiny bit more yeah that's
17:22 -good
17:24 -okay so we're get in there now basically
17:29 -just something that is important if you
17:31 -did undo anything on the inside here if
17:33 -you did undo like the outer door hand or
17:35 -anything like that we didn't in this
17:37 -installation and Danny did this can it
17:39 -be internal release just to make it a
17:42 -little bit more easier thing to get his
17:44 -arm in there to do up them dev nuts but
17:46 -make sure it's all done back up before
17:47 -your hope go ahead and close the door up
17:49 -and otherwise if you disconnect the
17:51 -outside hand or when you kind of put you
17:52 -your area wracked off in the inside here
17:55 -you can have a big problem getting in to
17:56 -open it up from the inside so that's all
17:58 -back to back to normal now then it's
18:00 -just going to put a bit more wax along
18:02 -with the access house
18:09 -so these grommets should be quite a
18:12 -tight fit is it's nicer if they are a
18:15 -tight fit it makes them make some stay
18:17 -in there and what Danny is doing is he's
18:21 -just using a small screwdriver just to
18:23 -help to push in the lid of the grommet
18:26 -on the inside lining it up the one side
18:32 -to start with and then using a little
18:35 -screwdriver to pushing the inner inner
18:37 -lip of the with the grommet whilst
18:39 -putting some pressure on it with his
18:40 -finger try not to stab yourself with a
18:43 -with a screwdriver in the finger of
18:45 -course I wipe away any of the excess or
18:54 -the wax oil off from the from the
18:56 -surface now
19:06 -now at this point just test your door
19:09 -open and closes properly and you can
19:12 -just lock from the remote control just
19:14 -to check your lock and unlock is working
19:16 -correctly from the remote control the
19:20 -doors in order to do that lock
19:28 -electronic deadlock second press yeah
19:31 -unlock that's good okay so that looks
19:36 -like good job in Danny not bad for your
19:37 -first one hey yeah box it back up now
19:41 -door panel back on
19:45 -you need to line up these clips you
19:47 -still all sort of move around a little
19:49 -bit so you want to actually line these
19:51 -up with the clips as you got it get it
19:53 -on there phone you can either sort of we
19:55 -live around a little bit and then they
19:57 -do create quite a good push and then
20:08 -line it up the door handle
20:23 -and then doing up for the teeth t30 torx
20:59 -so then it's just testing the internal
21:01 -handle now but he's doing it in a way by
21:04 -latching off the latch manually
21:05 -simulating the door closing and then
21:07 -pulling it just because he's got the
21:09 -load of racking inside his band and it'd
21:10 -be difficult to reach through from the
21:11 -inside to to pull that handle to test it
21:18 -so there we have it good job Danny well
21:21 -done okay so that's it all done
21:24 -basically the fan actually in terms of
21:27 -you use in the van it's just the same as
21:28 -it was before you fitted this plate so
21:31 -you're not actually using an extra lock
21:33 -by having this plate fitted you're not
21:34 -actually doing anything different with
21:36 -the van it's not a it's not a slam lock
21:38 -it's not a deadlock it's a shield so the
21:41 -shield is just protecting the
21:43 -manufacturers weak point of the band
21:45 -that's basically it the biggest weak
21:46 -point of the van is protecting it it's
21:48 -they're staying on guard stopping people
21:50 -from pushing the the hole through that
21:52 -through that thin bit of metal on the on
21:54 -the back of the van and getting into
21:56 -into your van to remove content outside
21:58 -shield inside shield it can act as a
22:01 -repair if you've already had the hole
22:03 -put in your van it can act as a
22:05 -deterrent if you've to stop people
22:07 -putting the hole in your van and it can
22:09 -act as a additional piece of security
22:11 -making it a lot more difficult to break
22:12 -into your van so this is really
22:15 -important to have it get in touch via
22:16 -the website is www.seannal.com the top
22:31 -we have the plate the shield on the
22:33 -bottom if you really keen you can have
22:35 -two locks on the back of the van here so
22:37 -you can have one low one high and then
22:39 -on the side those dual we have similar
22:41 -things we also have some PRS and some
22:43 -switches for your alarm system upgrade
22:45 -so yeah again get in touch via the
22:47 -website and let's help you get secure
22:48 -thanks for watching this video I hope
22:50 -that you enjoy it and and get order in
22:52 -your plate now good job dad anyway that
22:56 -thank you pretty much thanks for
22:57 -watching
22:57 -[Music]
23:05 -[Music]
Transcript source: the YouTube transcript supplied for this project with minor corrections. Automated transcripts can contain recognition errors and should be checked against the original video.