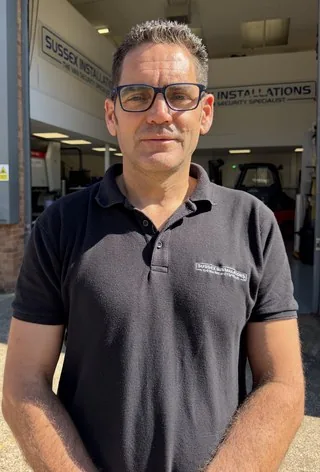
0:00 -hi I'm Jeff Scott from Sussex
0:01 -installations congratulations on your
0:03 -purchase of your external shield for
0:07 -your Ford custom van so here we go
0:10 -here's the shield set which you would
0:12 -have got you've got the actual shield Complete with gasket
0:14 -itself you've got the gasket there's a
0:16 -sticker they're saying about warning and
0:18 -don't over tighten the weld studs the Warning Sticker - Do not over-tighten the nuts
0:22 -nuts here and if you'll see that these
0:25 -washers are different sizes so just make
0:29 -sure that the right washer goes in the
0:30 -right place so today's instructional
0:32 -video for fitting this actually I don't
0:36 -have a whole van here to show you so
0:38 -I've got a door so I'm going to show you
0:40 -this on the door so first thing is to
0:42 -mask in tape the area that you're going
0:44 -to be working on that part of the door
0:46 -and then we're going to mark it up next
0:56 -if you just notice that the gasket is NOTE: The gasket is 1.5mm smaller than the metal
0:58 -1.5 millimeters smaller all the way
1:02 -around than the actual shield itself so If you use the gasket as a template
1:04 -if you're going to use the gasket to
1:06 -line up where your shields going to go
1:08 -you're going to want to have like a 1.5
1:10 -millimeter gap around the edge of the
1:13 -gasket in order that the shield will
1:15 -actually go flush with the edge of the
1:17 -door the way this this is shaped
1:20 -distorted see it's quite complicated
1:22 -shape here so go up and down until you Move the gasket up and down
1:24 -get the gasket in the right place once
1:27 -you're happy that it's lined up
1:28 -correctly now it is time to mark it up
1:39 -so we're ready to go now when you're
1:41 -drilling through this door just keep an Make sure the door is open when you drill
1:44 -eye on what's behind on the other side
1:46 -so at the moment this door is not
1:48 -connected to a van so we don't need to
1:49 -worry about drilling into the bodywork
1:51 -once we drill these holes so but if
1:55 -you've got your van door in the closed
1:57 -position you could end up drilling into
2:00 -the bodywork you're banned so I suggest
2:01 -you have the door all the way open when
2:04 -you're doing this and then once you're
2:05 -drilling through here why don't you go
2:06 -through you're not going to hit into any
2:08 -bodywork you've got a big space here
2:10 -longer than your drill bit hopefully but
2:13 -if you using a small drill bit and
2:14 -that's it putting your clearance the 1st use a pilot drill bit (3.5mm is a good size)
2:17 -drill to the hole
2:24 -these studs are six millimeter but we're The studs are 6mm
2:29 -gonna go with a slightly bigger drill
2:30 -bit anywhere up to around about eight
2:31 -millimeter we'll be fine
2:36 -you may already have damage on your fan
2:39 -door so although the shield is designed
2:42 -to go in this exact spot you might get
2:44 -to move it up a few millimeters or down
2:46 -a few millimeters just depending on
2:48 -where your damage is so we wanted to
2:50 -cover the damage once you've marked it
2:52 -out and you're sure that's going to
2:53 -cover the damage you might find it
2:56 -actually if it's a really bumpy surface
2:58 -it might be best to cut out a hole where
3:01 -the damage is so the shield is going to
3:04 -sit flush so you can do that identify To allow the shield to fit flush
3:06 -where it is make sure the shield is
3:08 -going to cover the entire area cut
3:11 -around where the damage is make the
3:14 -bodywork sit nice and flush and then go Now to carry on with fitting the shield
3:17 -ahead and carry on with fit in your
3:19 -shield though fit in testing out that
3:21 -your shield fits in the holes that
3:23 -you've made correctly and again if you Test that your shield fits in the holes
3:25 -make that hole slightly bigger than the
3:26 -six mil like eight millimeter then you
3:29 -should find that it goes in a nice easy
3:31 -fit yeah that's looking good so now
3:40 -you're happy with how it's fitted it's
3:42 -time to take off the masking tape Now remove the masking tape
3:52 -so we want to make sure all the swarf
3:55 -and debris has gone from this area but
3:57 -also you want to make sure that you
3:58 -didn't drop swarf like metal filings
4:00 -across anywhere else on your van okay
4:11 -now to rust protect the hulls we I would
4:13 -suggest clear wax oil this is available
4:17 -from like Halfords or many other places
4:20 -give it a good spray any of the cut
4:22 -metal edges take the sticky back off of
4:34 -the gasket and attach it to the shield
4:38 -if your fitting this shield to the right If you are fitting a shield to the right side door
4:41 -hand or the driver side of your van then
4:44 -it'll be the opposite way around and
4:45 -just leave the sticky side facing away
4:47 -from the shield
4:49 -you'll only match up one way around
4:51 -anyway
5:04 -we've deshield you've got big and small
5:08 -washers and you've also got the nuts
5:10 -these are all stainless steel and what
5:12 -you should do is use the big washers on Use the big washers inside the door
5:14 -the inside of the door use the small
5:17 -washers on the outside of the door so Use the small washers on the outside edge
5:19 -just put the small washers on this edge
5:21 -here so attach it all the nuts just
5:25 -loosely to start with once you've got
5:27 -all in place then we start to start
5:29 -tightening up using the big washers on Big washers here
5:40 -the inside of the door
5:50 -don't need to over-tighten these like
5:52 -man these are locked nuts so they're not And do NOT overtighten the nuts
5:54 -going to come undone if they are you
5:56 -know just partially tightened and what I
5:58 -mean by that is these these Wells does
6:01 -just don't over tighten them as you
6:03 -start to see the gasket compress when
6:05 -you're tightening up as the gasket
6:09 -starts to it starts to compress and
6:11 -pinch up and that's pretty much as tight
6:13 -as you should go you shouldn't carry on
6:16 -going you don't need to flatten this
6:17 -middle all the way down to the other
6:19 -middle just leave it with the gasket
6:21 -just starting to squish as it has done
6:25 -so wiping off the excess wax oil and
6:31 -then removing the protective cover from And remove the protective cover
6:34 -the shield some of this gets a little
6:47 -bit stuck in here which is just pick
6:50 -this off with your now if that's the
6:52 -case and if you do have some of the glue
7:01 -sort of looking smudged then some white
7:05 -spirit will take that off nicely
7:11 -[Music] Congratulations!
7:21 -and that's it congratulations you've
7:23 -fitted your Sussex installations repair
7:25 -shield so that will help to repair and
7:28 -secure your van we've you have an
7:30 -external shield or not
7:31 -either way we suggest you have our
7:33 -internal shield fitted because that's
7:35 -really important so I hope you found our internal shield in addition
7:37 -this video useful and I hope you manage
7:39 -to get your shield fitted no prom at all
7:41 -if you do struggle then of course you
7:42 -can book in with us and come down to get
7:44 -your shield fitted by us at our workshop
7:46 -in Eastbourne it might be possible we
7:48 -can do mobile service for you as well if
7:50 -you're in the southeast or in the London
7:52 -area thanks for watching the video hope
7:53 -that's useful and you have anything to
7:55 -do advanced security subscribe to the
7:57 -Sussex installations YouTube channel and
7:59 -fill out the newsletter form on our
8:01 -website
8:02 -Sussex installations code at UK thank www.sussexinstallations.co.uk
8:05 -you
8:12 -[Music]
Transcript source: the YouTube transcript supplied for this project with minor corrections. Automated transcripts can contain recognition errors and should be checked against the original video.